Jun 7, 2026
Using Server Sent Events
Brief explanation of how server sent events work, and a little implementation.
Hi, today we are going to talk about a subject that I have recently discovered, Server Sent Events… But first. Cache-Control: no-cache
Why?
Have you ever needed any real time update? There are some ways to implement this real time behavior, and no,
they are not making a GET request per second… One of these ways is and yes you guessed… WebSockets (okay maybe not funny), but another one is actually
server sent events, which we will cover in this entry.
How do they work and what makes them real time?
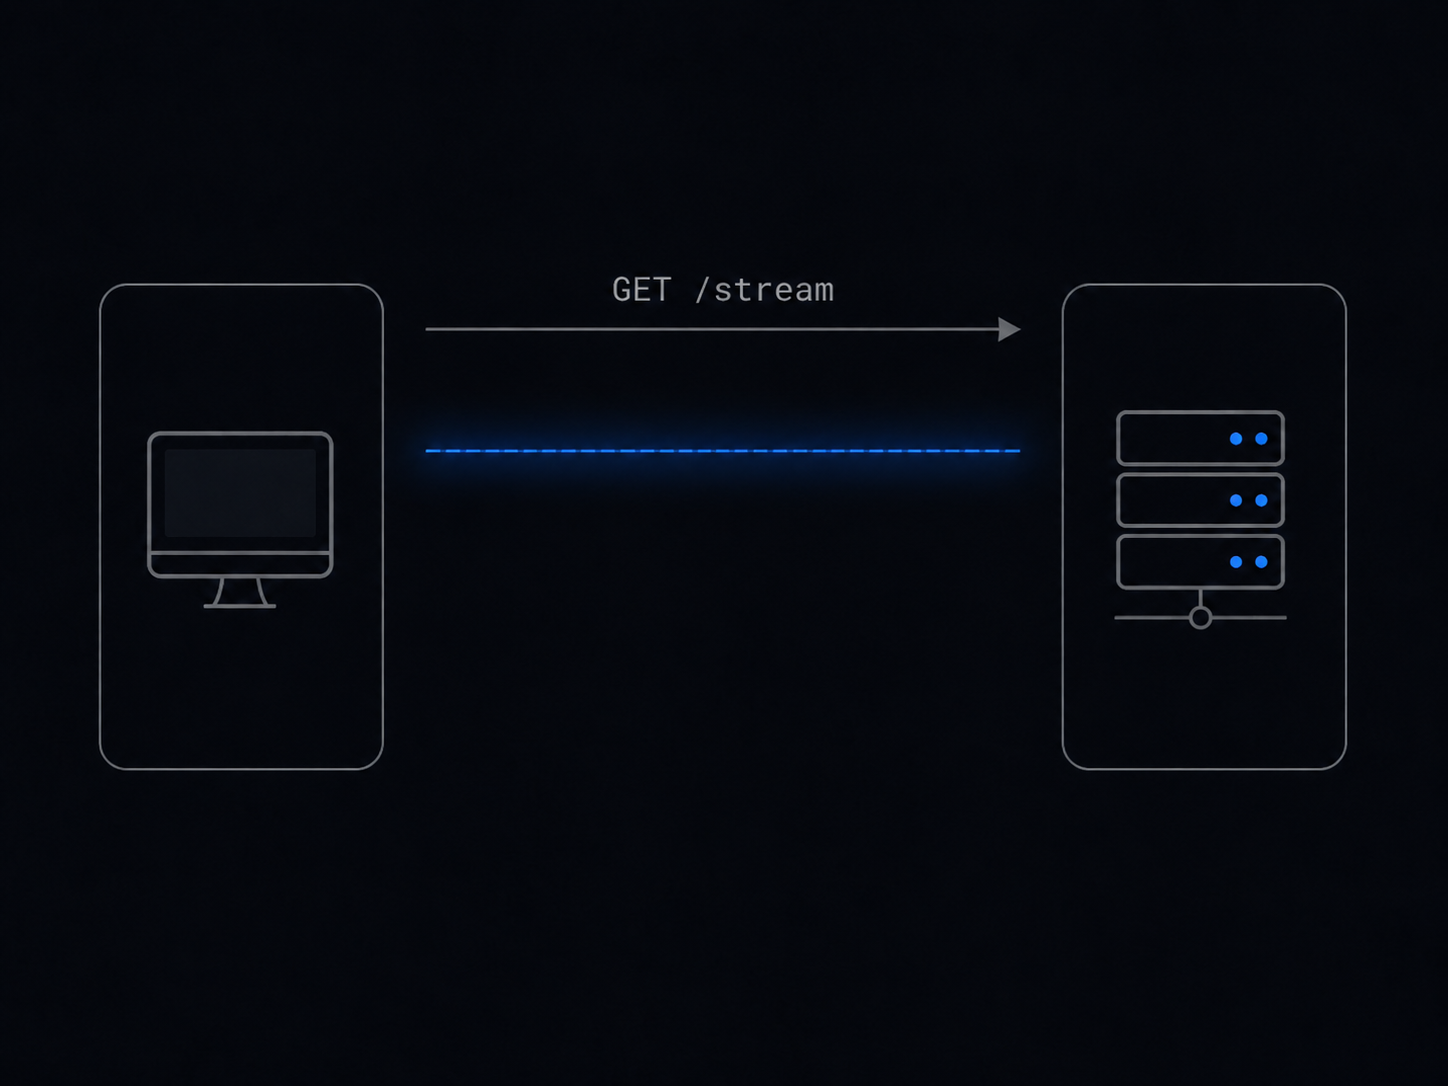
Well, server sent events or SSE work by making only one request… a simple GET that in this case, will persist.
    flowchart LR
    Browser[Client] -->|opens connection| Server[Server]
    Server -->|event: notification| Browser

    style Server fill:#111827,stroke:#ff8fab,color:#ffffff
    style Browser fill:#0f172a,stroke:#8bd3dd,color:#ffffff
The server and the user keep the connection, and make the request a stream of data that, in real time (updated by the server),
returns events that are received by our client. No more needed, just a single request, and a listener to that request.
Quick differences between WebSockets
- It is unidirectional, server sends, client listens
- Keeps the standard HTTP protocol
- It usually has previous logic around automatic reconnection
How can we implement them?
It is actually not that complicated, there are many patterns already written that we can follow.
Simply we can just follow the next pattern/steps:
- Return the header
Content-Type: text/event-stream - Return the header (usually)
Cache-Control: no-cache - Keep the connection alive
- Push or make a flush of the data in the following format:
data: <event>\n\n
Quick note, usually in client side the listener is already handle by using EventSource.
# For Python we will use FastAPI
import asyncio
import json
from fastapi import FastAPI
from fastapi.responses import StreamingResponse
import uvicorn

app = FastAPI()

async def event_generator():
    """Simple generator of events."""
    n = 0
    while True:
        payload = {
            "event": n
        }
        yield f"data: {json.dumps(payload)}\n\n"
        n += 1
        await asyncio.sleep(2)

@app.get("/stream")
async def sse_stream():
    return StreamingResponse(event_generator(), media_type="text/event-stream")

if __name__ == "__main__":
    uvicorn.run(app, host="0.0.0.0", port=8000)
// Here we use simple http, but the implementation with frameworks like Gin is
// about as simple.
package main
import (
"encoding/json"
"fmt"
"log"
"net/http"
"time"
)
type StatusPayload struct {
Event int `json:"event"`
}
func sseHandler(w http.ResponseWriter, r *http.Request) {
w.Header().Set("Content-Type", "text/event-stream")
w.Header().Set("Cache-Control", "no-cache")
w.Header().Set("Connection", "keep-alive")
// This checks whether the response writer supports streaming.
flusher, ok := w.(http.Flusher)
if !ok {
http.Error(w, "streaming not supported", http.StatusInternalServerError)
return
}
ticker := time.NewTicker(2 * time.Second)
defer ticker.Stop()
n := 0
for {
payload := StatusPayload{
Event: n,
}
data, err := json.Marshal(payload)
if err != nil {
http.Error(w, "failed to encode event", http.StatusInternalServerError)
return
}
if _, err := fmt.Fprintf(w, "data: %s\n\n", data); err != nil {
return
}
flusher.Flush()
n++
select {
case <-r.Context().Done():
return
case <-ticker.C:
}
}
}
func main() {
http.HandleFunc("/stream", sseHandler)
log.Println("SSE server listening on http://localhost:8080/stream")
log.Fatal(http.ListenAndServe(":8080", nil))
}As you can see the idea is the same, we set the right response header, and we push data through time without closing the connection.
You can test this by just making a simple: curl -N http://localhost:8000/stream
Or using almost any API client of your preference.
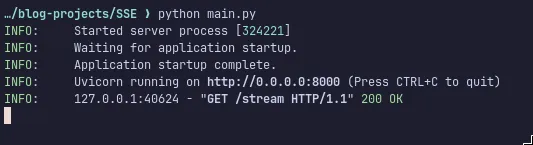
If you execute this, you will start watching this on your terminal or IDE:
- Server
- Client
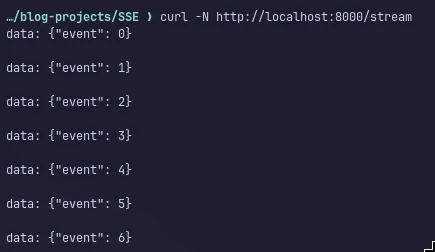
And well, besides the bad quality of my screenshots, and the fact that I do not have any interactive post where you can see this working in this page (sorry maybe some day), you can see the point, only one request needed, multiple data sent to our client.
You can have fun with those pieces of simple code, to make whatever you want, you could implement a notification system for your app, or a badly implemented message app by just making a trigger for those notifications. There are unlimited possibilities.
Considerations
As you read in the Go example, we check if the flush was supported, since this is a key piece of the code, you can have many architectures on your software, so there will be some times, when implementing this is not as straight forward as the examples, for example, if you have any intermediary between the server and the client, and the intermediary waits until the request is answered, you may need to implement some rules to skip on this endpoint, because this will hold all the events making the client not receive anything until it cancels the request, and when the client does that, it will also not see anything.
sequenceDiagram
    autonumber
    participant Client as Client (Browser/App)
    participant Proxy as Intermediary (Proxy/LB)
    participant Server as Go SSE Server

    Client->>Proxy: GET /stream (Accept: text/event-stream)
    Proxy->>Server: Forward GET /stream

    Server-->>Proxy: Headers (Content-Type: text/event-stream)
    Server-->>Proxy: data: {"status": "en_movimiento"} \n\n (Flushed)
    Note over Proxy: Intermediary holds data in memory,<br/>waiting for the server to finish the request.

    Server-->>Proxy: data: {"status": "llegada"} \n\n (Flushed)
    Note over Proxy: Still buffering...

    Client-xProxy: Cancels request (Timeout / Frustration)
    Proxy--xClient: Connection Closed (Client saw 0 events)
    Proxy-xServer: Drops connection to server
And well, that’s it, hope you enjoy this little explanation and example of this powerful tool, you can click on the Code example resource
to see a mini repo with another code implementation of this. I think that a lot of apps that I have seen made with AI also can use this resource, since it usually implements loops making GET requests again and again, spending network resources, so this tool or
knowledge might help you to improve your hand made or AI made apps.
If you like this entry in the blog, you can support by adding a little star to the repo of the example, or following in my github. I do not have any sections of comments by the moment, but I will try to add one as soon as posible to recieve feedback. Thanks for reading.